Showing posts with label Armada. Show all posts

Tuesday, 17 October 2017

Operation Cannon Ball - Armada

Sitrep
Insurgent vessels are engaged in mapping asteroid clusters near trading routes. Intelligence suggests they may be engaged in setting up bases for piracy or convoy raiding. Let them no that we are onto them, and that their activities will not go unopposed.

Threat Assessment
Variable - The local volume is full of asteroids and the insurgents will attempt to use this to their advantage. Keep your speed low and watch out for ambushes.

Combat Report
I think my deployment is getting better, but my fleet selection definitely needs work. Both the Jerkzanti - courtesy of our local gaming podcast and my Quasar failed to bring the pain, the latter, probably because it was out of position, the former, perhaps because it never got into it.
 
Deployment, with the traditional YOLO run setup from the ISD

I'm still not entirely sure how to use the Quasar properly, so I decided to run it into asteroids to collect victory points, or at least, deny them to Alex.

Relentless stares down an MC80
The first turns were - as is traditional, unexceptional. Squall bumped into some asteroids while nervously eyeing up the rebel escorts to starboard, while missing an opportunity to alpha strike squadrons (admittedly with fighters). Relentless dithered with its speed, trying to get the drop on the MC80 while Suppressor tried to do something unseful. Insidious yes, Insidious went for the flank.

It should be noted that I'd scored the first turn, which probably won me the game, as Alex was unable to fly a MC30 up my jacksie and keep it there.

Squall begins to have have A Bad Time while my fighters harass the scout frigate and trailing Hammerhead
My fighters finally got in on the action, jumping in on the reluctant rebel fighters, while Insidious and Relentless unloaded into the MC80.

*Pew! pew!*
Squall having racked up several points of hull damage already from hoovering up objectives, actually survived rebel fire long enough to plow into the MC80 losing its last hitpoint and exploding.

Explosions!
 Relentless' retaliation was swift and the MC80 was dispatched at the start of the next turn.

More explosions!
 At this point, my first turn advantage really came into its own. The below should have been a worrying set up, with several small short ranged units behind my ISD.
Pictured: no bueno!
 But because I had first turn Relentless was able to...

...Melt an MC30...

...Melt a hammerhead...
...Then fly the fuck away
Alex conceded at this point, foreseeing this series of events was bound to repeat itself over the coming turns (perhaps with less melting).

Sunday, 15 October 2017

Operation Flapjack - Armada

Sitrep
Insurgent ships have been detected at the edge of our sensor range. Intercept and destroy as many ships as you can.

Threat Assessment
Unknown - Sensor contacts are unclear. The insurgent fleet is either using less common ship types or the signal is being distorted by nearby anomalies. There appear to be multiple small contacts rather than larger ships; be cautious of flanking attempts.

Combat Report
Gonna be honest, I've forgotten a lot about this game; I should have got this battle report written up weeks ago. I've got fairly good memories of what happened but some of the details are fuzzy, so hear goes.

I deployed my ISD for one of my patented YOLO attacks runs - which meant it spent most of it's time dicking around in the rear.


This left the VSD on my left go stuck right, going down by turn 3, but not before killing a hammerhead.
And then the VSD arrived...
I should mention that I was losing the fighter game, but my defenders met their objectives, turning the space around the station into a meat-grinder and pinning Alex' bombers for the entirety of the game.

And then the VSD opened up, melting both the Nebulon and the Phoenix and boarding team ran amok.


Saturday, 2 September 2017

Operation Sourdough - Armada

Sitrep
The signature of the "flagship" of known terrorist mastermind "Admiral" Akbar has been traced to a location not far from your position. The elimination of this key player in the insurgent hierarchy will be a significant step towards restoring peace to the sector.

Threat Assessment
High - intelligence indicates the presence of 2 large ships, and a number of escorts. However, the crews appear to be recent converts to the Jedhadist cause. The two VSDs assigned to you have experimental loadouts as more conventional Star Destroyers are not in position to intercept. Use cation and avoid casualties.

Combat Report
Well, set up was a disaster. I managed to put Howlrunner on the opposite end of the board from my fighter ball, one of my VSDs started off very exposed and the Gozanti's on my left were effectively left to fend for themselves.

Setup
Featuring: my opponent effectively concentrating his forces

All ahead full!
I spent my opening turns trying to redeploy my capitals as fast as possible, hoping that my squadrons could counter the three squadrons my opponent brought and deal with his flanking corvettes.

The left flank plays it cool
Things got very dicey on the right flank. Both rebel capitals focussed on one of my VSDs - my carrier setup - almost resulting in it's destruction. My flagship was fairly heavily damaged as well. Both managed to survive, but things went badly wrong for the rebels and in a spectacular case of [IMAGE NOT FOUND] both capitals went down, one after another, after home one got pinned between both VSDs.

Not pictured: rebel capitals imploding
With the enemy capitals down, I just had to avoid colliding with my own ships, and dealing with the murderous corvette and torpedo ship who had flanked around to appear in my rear.

The final rebel ships come back for sweet hot vengeance...
But fail
In all honesty, I got lucky. I was trying to run a bomber list with very few actual bombers but with 2 capitals and a flotilla speced to command them. Both carrier capitals spent most of their time out of positions or scrambling to not die. My fighters were left in the lurch, for a couple of turns, getting mauled by AAA. I also definitely didn't get the most out of my quasar.

Friday, 18 August 2017

Operation Bronze Dragon - Armada

Sitrep
An insurgent force in possession of at least 2 large capital ships has been detected operating nearby. Navy forces are directed to interdict and destroy the terrorists before they can cause more damage.

Threat Assessment
Extreme - Deep range sensor indicate that insurgent forces are in possession of at least two large capitals from the Mon Calamari separatist worlds. They may have any number of escorts hiding in their sensor shadows.

Standby to make the jump to hyperspace.

Combat Report
 
I even managed to pull off a win! This was obviously down to pure luck LEET SKILLS and you should totally interpret this win as a sign of things to come.

In reality, my initial list was a little wonky and received some fine tuning before we started. To be fair I'm still in single figures of games played, and a lot of the game is list building, which I haven't really got a handle on yet.

Some of my list was fairly prescient, with the inclusion of killer android IG88 in particular, providing a hard counter to my opponents nasty unique squadron, while other parts, like the over-abundance of dice manipulation on the VSD being more or less wasted space.

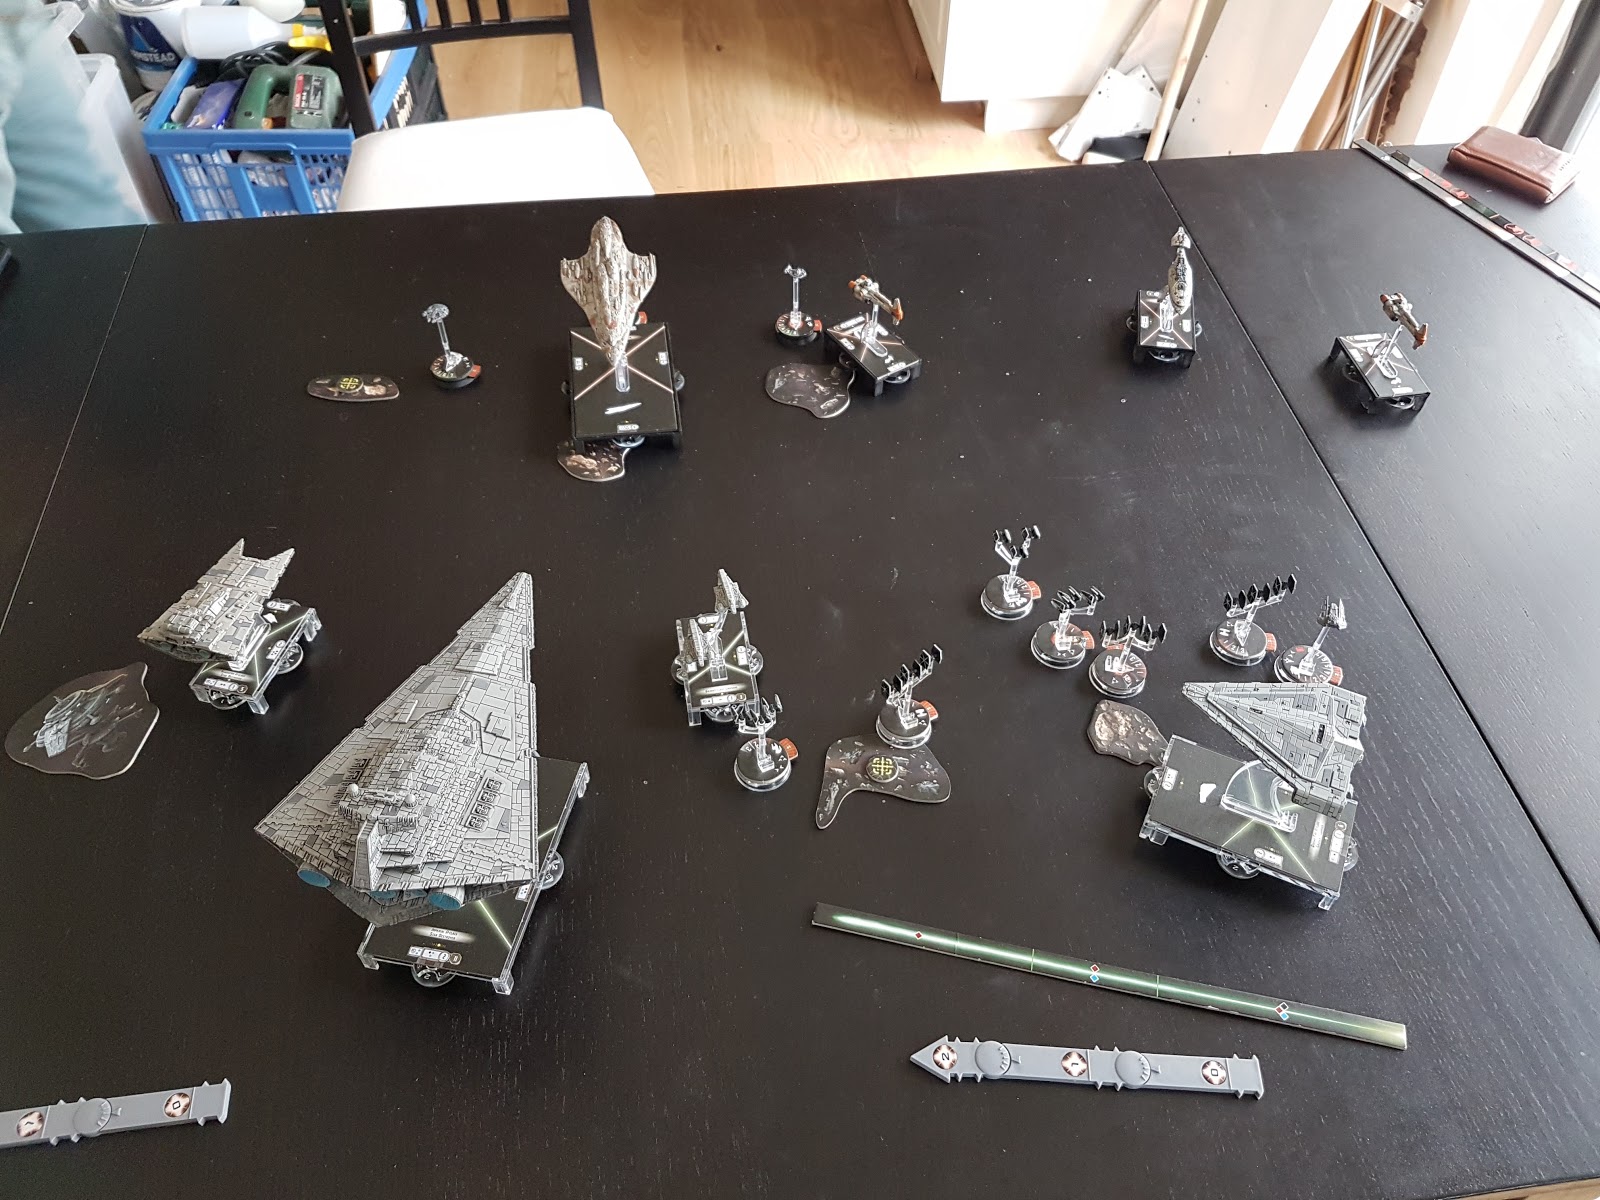
ISD Avenger begins attack pattern YOLO
I managed to avoid the humiliation conga this time, with all of my ships avoiding ramming into each other for the whole game (except on purpose).

Alex was gracious enough to let me walk back on some choices during a firing phase to let me take advantage of my boarding troopers after my ISD wound up on the objective and exchanging blows with his Home One(?). The blow was fairly devastating and the ship never really recovered

Centicore pisses about behind a fighter screen while rebel Hammerheads just piss about
 We determined, after the battle, that my opponents Hammerheads were out of place, spending most of the battle doing very little, where, if they have been deployed on the opposite flank, would probably have tipped the balance.

Imperial fighter supremacy(!) kicks on while Home One gets stuck between two Star Destroyers
Things started to unwind a bit when the other rebel capital swung up behind Avenger. My dials were very badly placed and I was getting neither squadron nor engineering commands I needed.

Home One goes pop
 But with home one destroyed I managed to swing the ISD out of the other capital's arc and it spent the rest of the game trying to chase it down.

Closing actions
Meanwhile, Centicore bagged a hammerhead and got bagged by the other in return, while Warlord emptied its magazine into the defenceless transports serving as the rebel carrier.

Evasive manoeuvres
Some lucky placing meant I avoided flying my ISD off the table in the last couple of turns, but nothing else really changed.

All in all, a thoroughly enjoyable where my opponent got to try out an experimental heavy ship list.

We also got to try out our house rules which included a pass mechanic which worked really well and not counting flotillas for tabling, which didn't really become relevant.

Thursday, 20 April 2017

Operation Good Fortune

Look it didn't go well and I cant remember many of the details.


 The whole thing turned into something of a fighter spam fest.


I did kill this bastard though, so there's that.


 Only these two got away.

Tuesday, 7 February 2017

Operation Lunar Eclipse


Counter-revolutionaries aligning themselves with the extremist Jedhadist faction have begun operating in the Corellian Sector. Even while declaring allegiance to the defunct and corrupt Old Republic they have begun a campaign of terror, raiding trade routes, sending VBED's against military and civil administration installations and infiltrating the civilian population, especially criminal elements.

Sitrep
Two space stations have been identified as serving as hubs for insurgent activity; providing fuel and supplies for smugglers and as a staging post for raids. Task Force Broken Anvil is to locate and destroy these stations. As the stations have been under insurgent control for so long, there will be few civilians remaining and those who are present will be actively collaborating with the insurgents.

Task Force Broken Anvil
Threat assessment
Minimal - while some dissident polities are suspected of supplying the insurgents with money and in some cases actual ships, no hostile warships have been detected in the area.

Initial Phases
Intelligence on enemy presence instantly proved wrong upon dropping out of hyperspace. Insurgent ships present in force. Gozanti carrier groups GC-N78g and GC-Y49g are thrown into disarray and collide with each other and VSD Illustrious.

GSD Demolisher begins it's attack run on the left flank while Illustrious attempts to hold the centre. Cruiser Dragon attempts to reorientate itself to protect the Illustrious' stern.

Fighter wings under Mauler and Howlrunner tie up and destroy insurgent fighters, intelligence later reports that several important counter-revolutionary leaders had to make emergency jumps to evade destruction.


Later Phases
Demolisher completes it's attack run, destroying one station, right before having to make an emergency jump out of combat, having suffered major damage.

Insurgent bombers manage to breach the defences of the Illustrious forcing her to make an emergency jump.
 

Dragon attempts to jump out but is damaged mid-jump. She is recovered later suffering from major damage. GC-N78g is also forced to make an emergency jump after suffering losses. GC-Y49g manages to gather up the remaining tie fighters before making a safe jump out of the system.

Analysis
Destruction of one insurgent station has severely degraded terrorist activity in the area. Intelligence suggests that the remaining station has been repositioned, and it will be some time before it can begin to operate safely again.

However, the casualties sustained by Task Force Broken Anvil cannot be sustained. The insurgent fleet suffered very little damage in return. This must change.